Next Post
This post may contain affiliate links, please see our privacy policy for details.
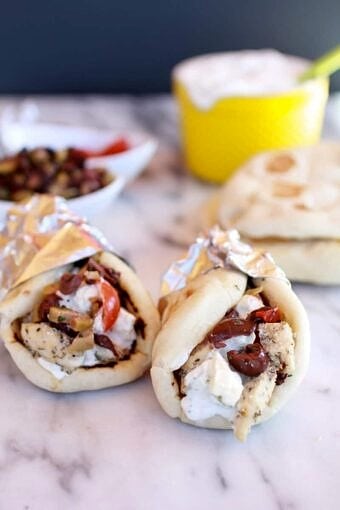
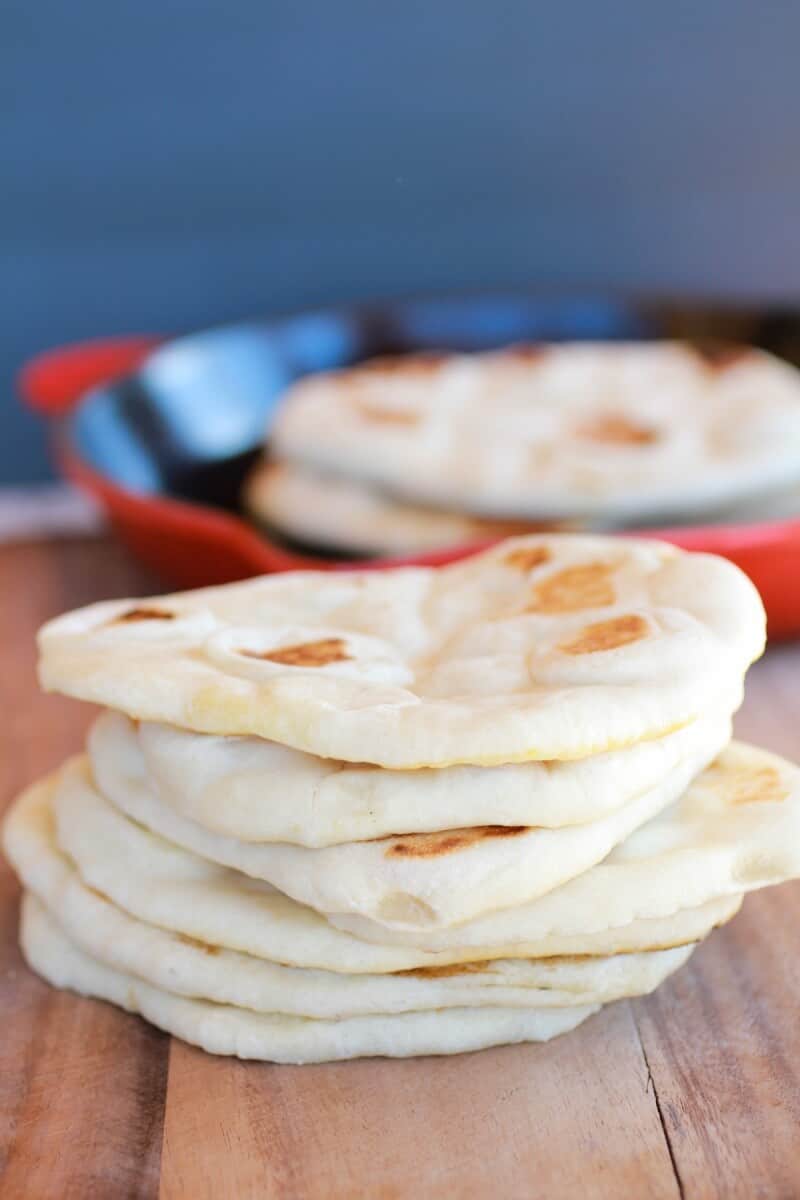
Warm, fresh pita is one of those simple joys—soft, a little chewy, and perfect for scooping up all the sauces. This is my cozy, dependable way to make Greek-style pitas at home.
We’ll use a straightforward dough, a hot pan, and a few easy cues so your pitas puff beautifully—no special gear required. Great for weeknights, meal prep, and any “let’s make gyros” cravings.
These are just that good.
Like it is crazy, just insanely good. You could not get them better unless you flew to Greece.
I can promise you guys, that after you make this easy homemade traditional Greek pita bread you will never want to buy the store-bought version again. Sure, you may have to for convenience and time purposes, but you will probably be wishing you were eating these.
Nah, not probably. You will. Guaranteed.
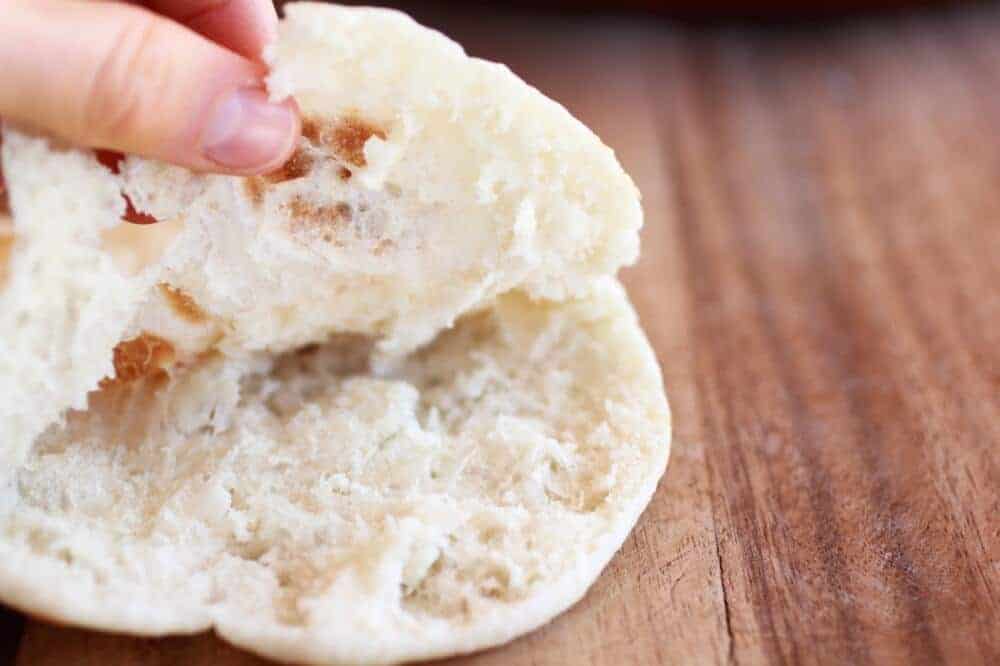
They’re so soft, so chewy and the flavor is just so good. There really are no words to describe just how good these are.
If you can make pizza dough, you can make these. And even if you have never made pizza dough, you can still make these. They are so simple and the dough is really easy to work with. These pitas are going to transform your lunches and even your dinners! Greek pizza? Yes!
Make-Ahead, Storage & Reheat
-
Dough: After the first rise, refrigerate dough (lightly oiled, covered). Use within 1–2 days; let it warm up just until pliable before rolling.
-
Cooked Pitas: Cool completely, then store airtight at room temp for a day or two; refrigerating can toughen—reheat with a quick steam or warm skillet.
-
Freeze: Freeze stacked with parchment between pitas. Reheat straight from frozen in a hot skillet or wrapped in foil in a warm oven until soft and steamy.
FAQ:
Why didn’t my pitas puff?
Usually the pan wasn’t hot enough, the dough was rolled too thick, or the discs dried out. Heat the skillet well, roll evenly, and keep dough covered as you work.
Can I make these without a cast-iron skillet?
Yes—use any heavy-bottomed skillet or a griddle. Just preheat thoroughly; the right surface heat is more important than the pan material.
Can I prep the dough ahead?
Make the dough, let it rise, then refrigerate up to 1–2 days. Bring to a workable, slightly cool room temp so it rolls without springing back.
What’s the best way to reheat pita?
A hot, dry skillet or a quick foil wrap in a warm oven restores softness; a short steam also works. Avoid microwaving too long or they’ll toughen as they cool.
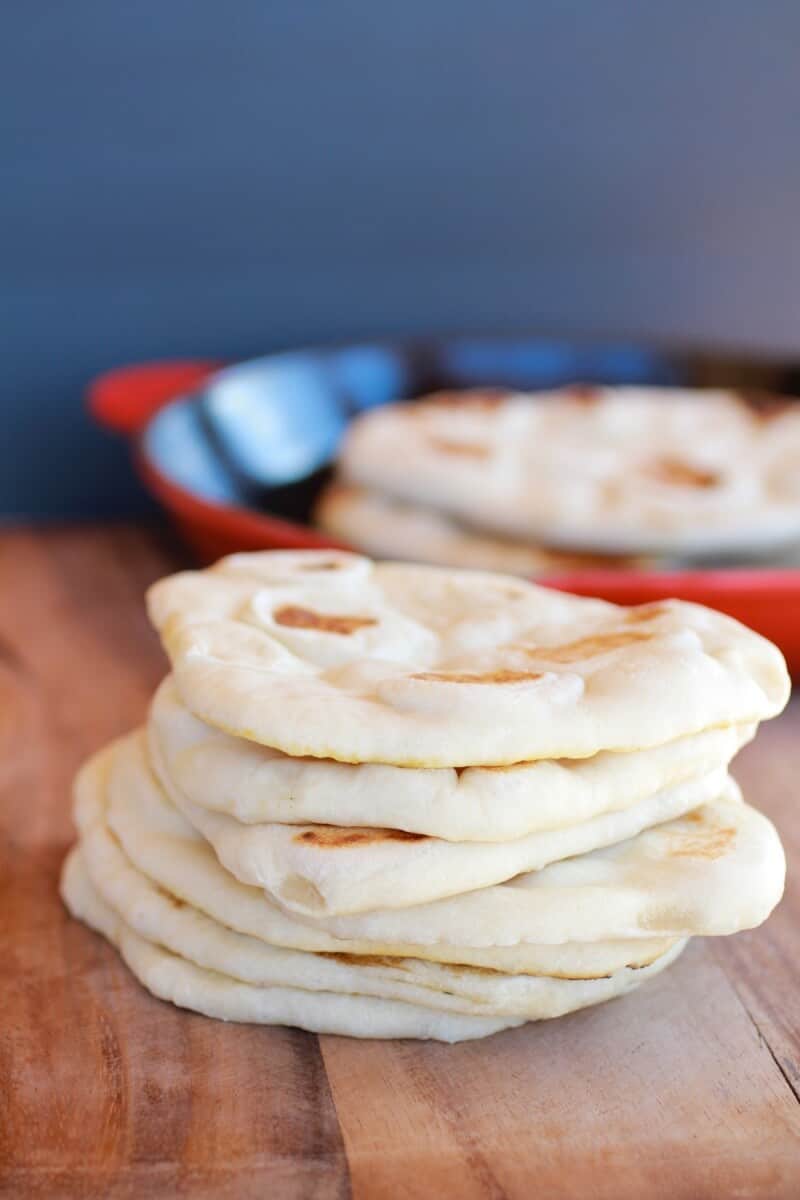
Traditional Greek Pita Bread.
Servings: 8 pita rounds
Calories Per Serving: 193 kcal
Nutritional information is only an estimate. The accuracy of the nutritional information for any recipe on this site is not guaranteed.
Ingredients
- 1 cup hot water but not boiling
- 2 teaspoons active dry or instant yeast
- 2 1/2 - 3 cups all-purpose flour
- 2 teaspoons salt
- 1 tablespoon olive oil
Instructions
- Mix the water and yeast together in the bowl of a stand mixer (a large bowl will also work if you do not have a mixer), and let sit for about five minutes until the yeast is dissolved. Add 2 1/2 cups of the flour (saving the last half cup for kneading), salt, and olive oil. If using a stand mixer attach the dough and need the dough on medium speed for 8 minutes, adding more flour until you have a smooth dough. If using your hands sprinkle a little of the extra flour onto your clean work surface and turn out the dough. Knead the dough for about 5-7 minutes, until the dough is smooth and elastic. Add more flour as needed to keep the dough from sticking to your hands or the work surface, but try to be sparing. It's better to use too little flour than too much. If you get tired, stop and let the dough rest for a few minutes before finishing kneading.
- Clean the bowl you used to mix the dough and run it with a little olive oil. Set the dough in the bowl and turn it until it's coated with oil. Cover with a clean dishcloth or plastic wrap and let the dough rise until it's doubled in bulk, about 1 hour.
- At this point, you can refrigerate the pita dough until it is needed. You can also bake one or two pitas at a time, saving the rest of the dough in the fridge. The dough will keep refrigerated for about a week.
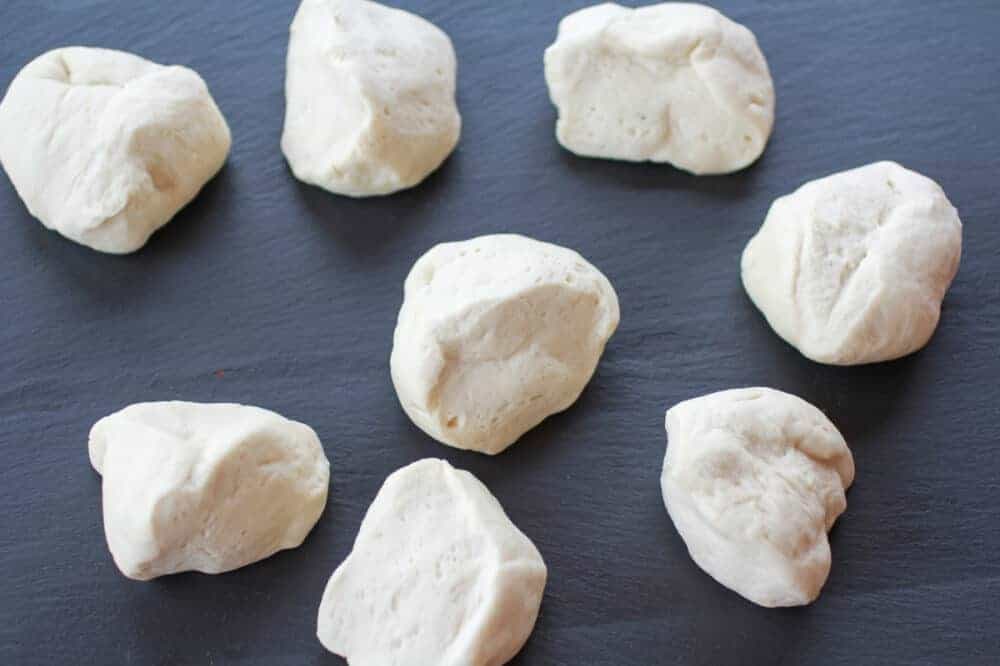
- Gently deflate the dough and turn it out onto a lightly floured work surface. Divide the dough into 8 equal pieces and gently flatten each piece into a thick disk. Using a floured rolling pin, roll one of the pieces into a circle 8-9 inches wide and about a quarter inch thick. Lift and turn the dough frequently as you roll to make sure the dough isn't sticking to your counter. Sprinkle with a little extra flour if it starting to stick. If the dough starts to spring back, set it aside to rest for a few minutes, then continue rolling. Repeat with the other pieces of dough. (Once you get the hang of it you can be cooking one pita while rolling the next one out.)
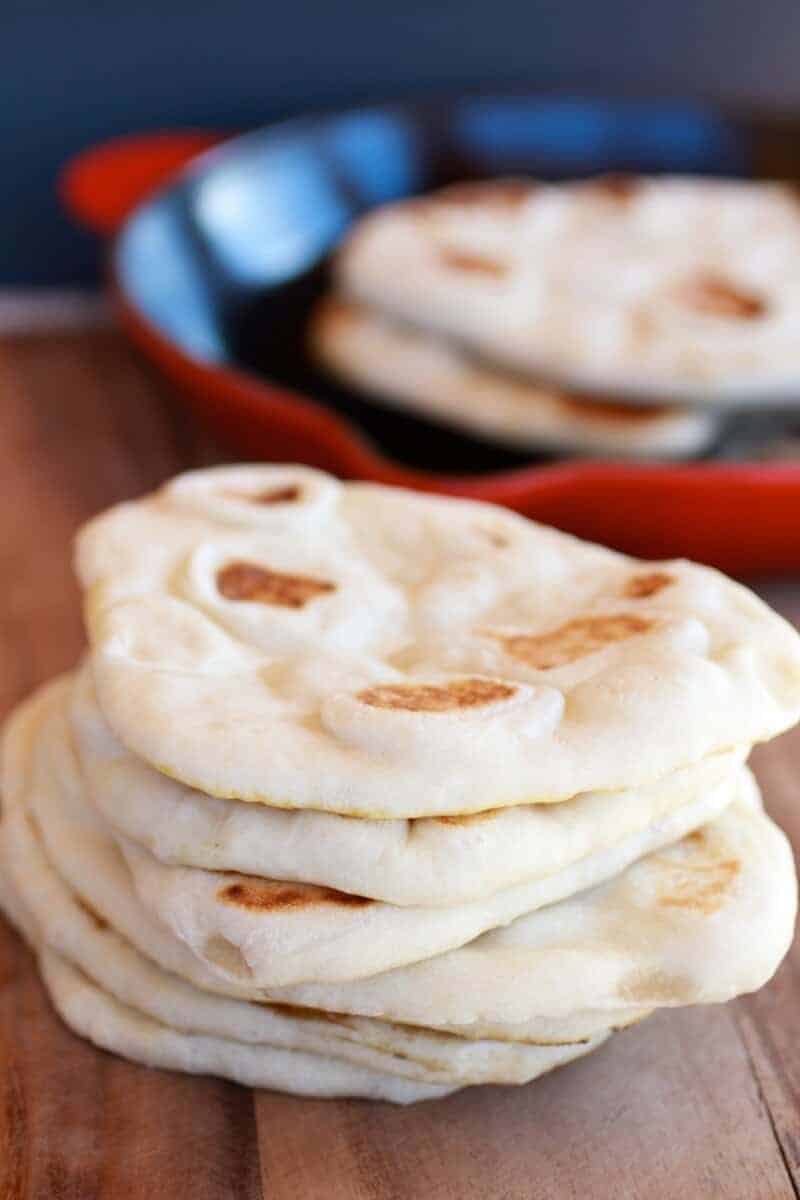
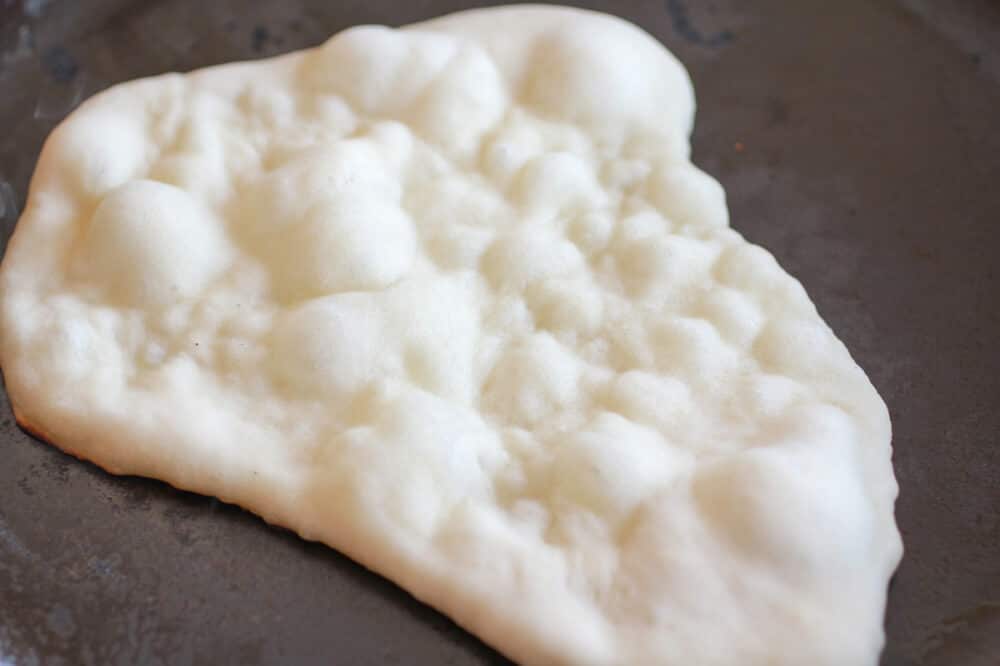
- Warm a cast iron skillet over medium-high heat (you want a hot pan). Drizzle a little oil in the pan and wipe off the excess.Lay a rolled-out pita on the skillet and bake for 30 seconds, until you see bubbles starting to form. Flip and cook for 1-2 minutes on the other side, until large toasted spots appear on the underside. Flip again and cook another 1-2 minutes to toast the other side. The pita should start to puff up during this time; if it doesn't or if only small pockets form, try pressing the surface of the pita gently with a clean towel. Keep cooked pitas covered with a clean dishtowel while cooking any remaining pitas.
- These are best eaten fresh, but will keep in a ziplock bag for a few days or in the freezer.
It is Sunday. The perfect day to make some fresh homemade Greek pitas!
Shared with: Inside BruCru Life, Lil Luna, Chef In Training, Buns In my Oven, Foodie Friday Friends, Tidy Mom, Taste and Tell, Cheerios and Lattes, Somewhat Simple, Mom on Timeout, I Heart Nap Time, Fine Craft Guide, The Country Cook, Whipperberry, Chef In Training
This post was originally published on February 17, 2013


I have made these pitas so many times!! I have gotten so many compliments on them. Every time I make them I have to double or even triple the batch because everybody wants more! Thank you so much for the recipe!
Thank you Kelly! I am so glad you enjoy this recipe!
I would recommend using a pastry cloth when rolling dough out. Saves the trouble of dough sticking to the counter or cutting board. 😉 It’s especially a must-have when making pie crusts. 😉
Thanks Tim!
thank you very much for the recipe and i’ll definitely try this soon. this article is very useful to anyone who is interested about it. thank you for the article and keep up the good work.
Thank you so much Diana!
The flavor of these is Excellent.
I found that if I rolled them out very thin, they will do the magic pocket puff, and if Irolled them a little thicker, they were perfect for souvlaki sandwich.
Also, they were great brushed with olive oil and sprinkled with flake salt after they were done on the skillet.
thanks for this simple recipe!
I am so happy you liked these Jane! Thank you!!
love your recipe!! how long would you say you can keep in the freezer? thanks!
Up to 3 months in the freezer. Let me know if you have other questions. Hope you love this recipe. Thank you! 🙂
Just tried these today. Only one problem, I ate them with some tzaziki as fast as I made them….:) Delish. I was skeptical because I’ve never found pita as good as when I lived in Greece. These were them!! After cooking them, brush with a little olive oil and a sprinkle of seasoned salt, throw them on the grill to warm beside your pork and you’re eating the street food from Glyfada. Excellent. Thanks for the recipe.
This is so awesome! I am so glad you love this recipe and that its as good as the bread you had in Greece… what a compliment!! Thank you + I hope you enjoy other recipes on my blog as well!
Yesterday I decided to give this recipe a go: I’ve been making bread for years but for some reason never made pita type breads. biiiig mistake. Hubby and I are now hooked. I made a delish lamb shawarma filling to go with it. oh joy! oh bliss! even if I do say so myself. kudos on your blog, I’ll be coming back regularly.
Oh wow yes! I’m hooked as well! The lamb Shawarma sounds amazing!!
Thanks so much Adrienne!
Hi I am so delighted I found your blog, I really
found you by accident, while I was looking on Yahoo for something else, Regardless I
am here now and would just like to say thank you for a incredible post
and a all round entertaining blog (I also love the theme/design), I don’t have time to read it all at the minute but I have bookmarked it
and also included your RSS feeds, so when I have time I
will be back to read a great deal more, Please do keep up the superb b.
I am so glad you found my blog too! I hope you love this recipe and others as well! Thank you!
Right here is the perfect blog for anyone who really wants to find out about this topic.
You realize so much its almost hard to argue with you (not that I really would want to?HaHa).
You certainly put a brand new spin on a topic that has been written about for a long time.
Excellent stuff, just great!
Thanks!
I’ll never buy pita from the store again. Thank you! Still working to roll out the best thickness and figure out the best temp on my stove, but all were nonetheless tasty.
I am so glad you like this Sean! Thank you so much!
we r making this in foods class lmao
Sounds like a pretty fun class!
These are awesome. The best recipe I’ve tried. They all puffed but the first one, which was operator error. Thank you so much for sharing
So happy you liked them Mary, thank you!
I am having a Greek Dinner party next week and will definitely give this recipe a try. Thanks for sharing.
I hope you love it! Thank you Dmitri!
I just made them: so simple and delicious. I ate them with roasted chickpeas, veggies and tzatziki, and it really made a difference. Thanks for sharing the recipe!
Sounds super yummy! Really happy you loved this recipe, thank you!
Man, you’re, they are insanely good!!! Incredible!! Thanks so much for sharing!!!!