Next Post
Easy Healthier Crockpot Butter Chicken
This post may contain affiliate links, please see our privacy policy for details.
I really love homemade bread, especially this homemade naan. I put together step by step photos and instructions for you guys, so there is really no messing up this one! There is even a video…..ok, you guys have to try this!! You won’t regret it, promise!

Well, actually my mom really loves homemade bread and I love to making her happy! I think I will always love making my mom happy, whether I am nineteen or fifty (oh my gosh, I cannot even imagine). It’s just something that makes me happy, so I guess it’s a win win!
Plus, I mean homemade Naan? Yeah, there is not much better. It’s stinkin amazing!
It’s so easy that I thought you guys would like seeing the process a little bit. The pictures are not awesome, but you’ll get the idea. So here we go!
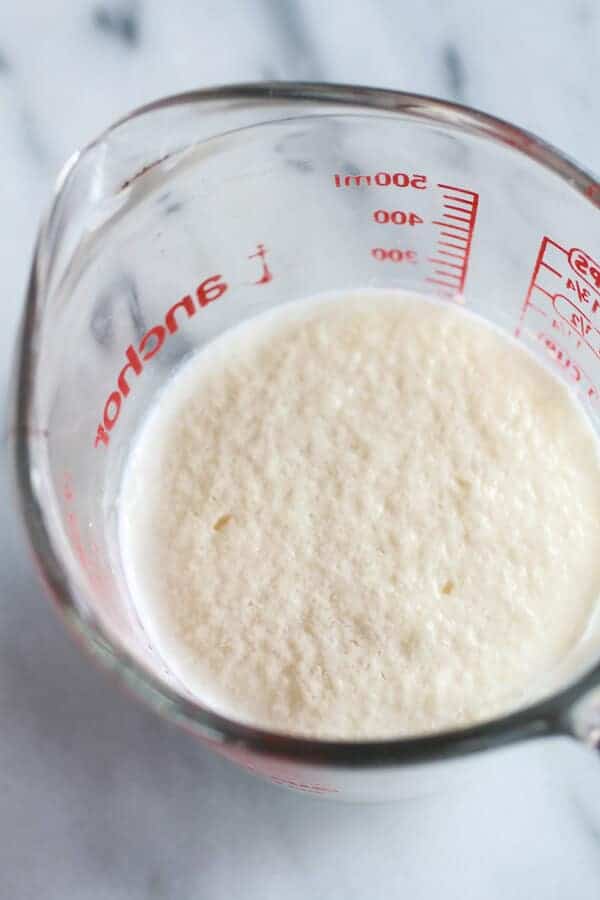
Start by activating the yeast. Combine the warm water with the sugar and yeast. Let sit for 10 minutes until foamy. It should smell bread like.
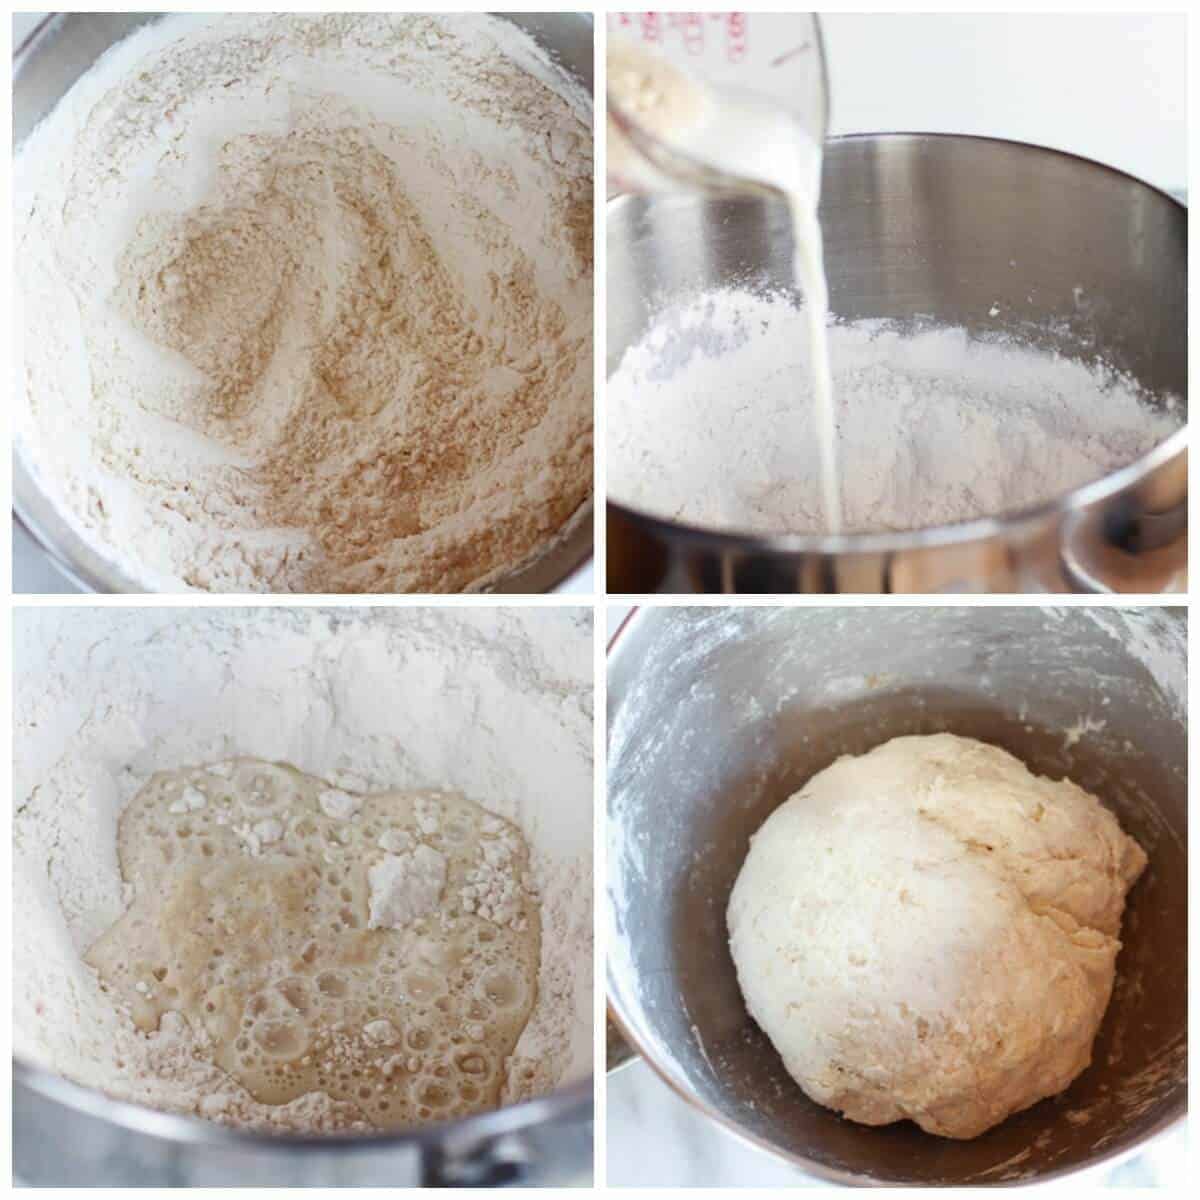 Add the flour, baking powder and baking soda to a large bowl. Then add the warm milk and yogurt to the yeast mixture. Pour the yeast into the flour. Mix with a wooden spoon until dough starts to come together and then finish mixing the dough with your hands until a smooth but still sticky ball forms.
Cover the dough with a damp towel or plastic wrap and let sit in a warm place for one hour.  After one hour punch the dough down and divide into eight equal balls. Using a rolling-pin, roll each piece of dough into an oval shape. The dough should be about 6-8 inches long and about 1/4-inch thick, but no thinner. Repeat this method with the rest of the dough.
Warm a cast iron skillet over medium-high heat (you want a hot pan). Brush both sides of the Naan with melted butter and if desired sprinkle on any spices you enjoy, such as cumin and garlic. I did not flavor my Naan, but only because one, I know my family is picky and two, I knew we would be eating the leftover Naans for breakfast and well I love garlic, I do not normally want it for breakfast!

Place the Naan on the hot skillet, cover and bake for 1 minute, until you see bubbles starting to form. Flip and cook for 1-2 minutes on the other side until large toasted spots appear on the underside. Brush with a bit more butter if desired and sprinkle with a little kosher salt, fresh cilantro (loved the fresh cilantro naans) or other herbs. Place the Naan in a tea towel-lined dish. Repeat with the rest of the Naans.
Done!
Pretty easy, right?

And so good!
It is actually very similar to this pita bread, but maybe even better. I think it is the yogurt in the dough. It adds the best flavor and oh my gosh it is so soft and those giant air pockets? Yeah they are awesome!
Seriously,
I just can’t even get over these. There are no words.

Nutritional information is only an estimate. The accuracy of the nutritional information for any recipe on this site is not guaranteed.

Except expect yum!
As Seen In


Hi! I would like to try this recipe but I cannot have white flour. Can I replace the all purpose flour with whole wheat or any kind of nut flour?
Thank you!!
Hey Julie, I recommend using whole wheat pastry flour or white whole wheat flour, either should work great! Please let me know if you have any other questions. I hope you love this recipe! Thank you! xTieghan
I’ve made this 3 times now! They are so delicious and easy. Thank you so much for this!! I made them with the 30 minute Butter Chicken Meatballs. Yum! I froze them for my daughter and she heated them up in the microwave in a damp paper towel and they were great. Is there a better way to beat them up from frozen? Great great recipe!
Hi! I recommend warming them in the toaster actually. that is was we do and we love it. Please let me know if you have any other questions. so glad you love this recipe! Thank you! xTieghan
This is SO good – so much better than store-bought, I don’t think I can go back.
So happy to hear that! Thank you Libby! xTieghan
I just have to say WOW! Amazing so fast and simply went out to buy a cast iron skillet found it on sale and used it was the best ever. I have to say it’s so so delicious ? will keep on making it homemade is the way to go. Thanks for sharing the recipe wow amazing!
Thanks
Thank you so much! I am so glad you loved this recipe, Stella! xTieghan
I just finished shoving a delicious piece of this into my gullet and I’m so very pleased with how they turned out! I had to do a bit of improvisation but it all worked out wonderfully. I used cashew milk instead of cow milk because that’s what I had, and I discovered I was out of bakind soda and didn’t feel like going to the store again so I subbed an extra 2tps of baking powder. I also don’t own a cast iron pan so I did have to use my non-stick, but after a bit of tweaking with the temperature and time (the first few ended up rather burnt on one side), I figured it out and they still ended up with a decent amount of air bubbles (med-high heat, 35 seconds on the timer). Thanks so much for this brilliant recipe!
Thank you so much Samantha! I am so glad you loved this recipe! xTieghan
Can I use but milk to make the naan?
HI! I don’t recommend using buttermilk. I am not sure how that would turn out. Please let me know if you have any other questions. I hope you love this recipe! Thank you! xTieghan
Oops forgot to rate! We loved them, made tonight with Butter Chicken. Barely made it to the table and already requested to make again.
Made these tonight with Butter Chicken, so good barely made it to the table!
Thank you so much Arlene! xTieghan
So good!!!! And pretty easy! We used our tortilla press which I would recommend for an even faster way to pump these out!
So smart, I love that idea! Thank you so much Lauren! xTieghan
Wow Tiegan! What have you scooped with them? I can only imagine!
Hi Tieghan!
I have a question – I made the dough last night and left it in the fridge to use for this evening – does that mean when I take it out to make it tonight that I should leave it in a warm place for an hour?
Thanks! I’ve made this recipe before and LOVED it, but never tried making it ahead of time!
HI! Yes, I would leave the dough at room temp for an hour before cooking. This makes the dough much easier to work with. Please let me know if you have any other questions. I hope you love this recipe! Thank you! xTieghan
Is it ok to use Icelandic skyr yogurt in place of greek yogurt? It’s just as thick. Just wondering if i have to go to the store since I have the rest of the ingredients with me right now lol.
HI! I am sure that will be just fine. Please let me know if you have any other questions. I hope you love this recipe! Thank you! xTieghan
these look amazing! I am just wondering if it would be possible to substitute whole wheat flour or is all purpose best to use ?
HI! I would recommend using 1/2 all-purpose and 1/2 whole wheat for best results. If you use all whole wheat the naan will be a little dense. Please let me know if you have any other questions. I hope you love this recipe! Thank you! xTieghan
I love everything about your combination of ingredients, textures and color! This chef is a big fan of YOU!
Thank you Jen!
The directions under the photos are very different than the directions at the bottom under “recipe.” Under the photos you add ingredients separately and in different bowls. Under the instructions you listed to add yogurt milk baking powder, soda, etc to the yeast mixture. Frustrating because mine is not at all turning out.
Hi Hayley, You should follow the directions listed under the recipe. Both variations will work, but the one listed under the recipe are more straight forward as I have updated them over the years. Is there something you are having trouble with that I can help answer for you?